All posts by admin

Migrating a Linux OpenVZ Virtual Server (VPS) from vePortal to SolusVM

To start export an OpenVZ virtual server from the vePortal client portal:

1.      Login to the users veportal account with the username and password:
example:  http://1.1.1.1:2407/login.php
2.      Visit the Backup Functions tab
3.     Click New Backup, make sure the Backup limit is not reached under VPS Resource Limits on the left hand information pane.
4.      Wait until backup completes (this may take awhile)
5.     Click Download Backups in the Backup Functions Tab
6.      Now you should have a tar.gz file for the VPS backup. This is the data you will be migrating. You’ll need to FTP this somewhere soon.

Important: Take note of the OS and arch of the VM you have just exported. You’ll need to create the same container in your SolusVM master.

To import (create db entries in solusvm) a OpenVZ virtual server from the admincp do the following. (Ref: http://docs.solusvm.com/importing_virtual_servers?s[]=import&s[]=openvz)

7.     First enable Import Mode from the admincp go to Configuration » Settings » Other and tick Import Mode   ON . Click Update.
8.     Select Virtual Servers » Add Virtual Server
9.     Select OpenVZ
10.     Select the Node & Plan then click Continue
11.     Enter the container id of the virtual server you want to import (as show under vzlist -a on the host node) in the Container ID field. Also go back to Virtual Servers -> List Virtual Servers and pick the next highest number in the VMID. If the greatest take number of an active VPS is 118, you will use 119.
12.     Fill in the rest of the fields, select the client, give it a hostname, and choose the OS and Architecture of the VM that you exported (important to match the same arch and close version).
13.     Click the Create Virtual Server button
14.      Save the virtual server details, click continue.
15.     Now if you are only importing this VPS,  DISABLE Import Mode from the admincp go to Configuration » Settings » Other and tick Import Mode  OFF .

Now you have the shell of the VM and its created in SolusVM! Half way there. Time to move your data over.

Move and prepare your data
16.      Take your tar.gz from the export and FTP it somewhere secure.
17.     If the file has a ‘-‘ before the filename, remove that dash. Linux doesn’t particularly like files that start with a -.
Ex:     -backups-3005136-veportal_3005136_06-26-14_75f32b95cc_vesave.tar.gz

18.     SSH to the SolusVM slave where you setup this VPS in step 10.
19.     Change directory to /vz/private

Note, there is no directory for the VPS you just created in SolusVM

[code lang=”bash”]
[root@reek ~]# cd /vz/private/
[root@reek private]# ls
113 117 118
[root@reek private]#
[/code]

20.     So lets create the folder for the VPS we are migrating.
[code lang=”bash”]
[root@reek private]# mkdir 119
[root@reek private]# ls -al
total 24
drwx——.  6 root root    4096 Jun 26 20:10 .
drwxr-xr-x.  9 root root    4096 Jun 16 23:24 ..
drwxr-xr-x  23 root root    4096 Jun 26 02:04 113
drwxr-xr-x  20 root solusvm 4096 Jun 25 10:44 117
drwxr-xr-x  21 root root    4096 Jun 25 11:05 118
drwxr-xr-x   2 root root    4096 Jun 26 20:10 119
[/code]
21.      Make sure perms and ownership are OK
22.      Change to the directory you just created and wget the tar.gz that you uploaded in step 16
[code lang=”bash”]
[root@reek private]# cd 119
[root@reek 119]# ls
[root@reek 119]# pwd
/vz/private/119
[root@reek 119]# wget source.com/backups-3005136-veportal_3005136_06-26-14_75f32b95cc_vesave.tar.gz[/code]
Again, make sure you removed the – in the front of the filename. You can do this now on the destination server if you want too.
[code lang=”bash”]
[root@reek 119]# ls
backups-3005136-veportal_3005136_06-26-14_75f32b95cc_vesave.tar.gz
[/code]

23.       I ran into some errors when trying to untar the tar.gz, so follow these commands:
[code lang=”bash”]
[root@reek 119]# gunzip backups-3005136-veportal_3005136_06-26-14_75f32b95cc_vesave.tar.gz
gzip: backups-3005136-veportal_3005136_06-26-14_75f32b95cc_vesave.tar.gz: decompression OK, trailing garbage ignored
[root@reek 119]# tar xf backups-3005136-veportal_3005136_06-26-14_75f32b95cc_vesave.tar
[root@reek 119]#
[/code]
24.      Okay, so note the VMID of the export and the new VPS are different in this case (3005136 and 119). So we need to manually move files after they have been uncompressed.[code lang=”bash”]
[root@reek 119]# ls
backups-3005136-veportal_3005136_06-26-14_75f32b95cc_vesave.tar etc vz
[root@reek 119]#
[/code]
25.      Drill down in the uncompressed files (/vz/private/YOUROLDVEID)
[code lang=”bash”]
[root@reek 3005136]# pwd
/vz/private/119/vz/private/3005136
[root@reek 3005136]# ls
aquota.group aquota.user bin boot dev etc home lib lib64 media mnt opt proc root sbin selinux srv sys tmp usr var
[root@reek 3005136]#
[/code] Here we have found what we are looking for! Our VMs data.
26.      You want to move all of these files to the /vz/private/NEWVEID directory. In our case /vz/private/119/
27.      So move those..

[code lang=”bash”]
[root@reek 3005136]# mv * /vz/private/119/
mv: overwrite `/vz/private/119/etc’? y
mv: cannot move `etc’ to `/vz/private/119/etc’: Directory not empty
[root@reek 3005136]# ls
etc
[root@reek 3005136]#
[/code] It gave me an error because there was already an etc/ in the /vz/private/119 dir. So remove that old etc and put the one from the decompressed file. Make sure files in both seems fine before removing and moving…
28.
[code lang=”bash”]
[root@reek 3005136]# rm -rf /vz/private/119/etc/
[root@reek 3005136]# ls
etc
[root@reek 3005136]# mv etc/ /vz/private/119/
[root@reek 3005136]#
[/code]
29.      Now we are in business and almost done. Drill down into our target directory (/vz/private/119). Make sure everything looks good. Compare dirs with other VMs you have that are working if you need a sanity check.
[code lang=”bash”]
[root@reek 3005136]# ls
[root@reek 3005136]# cd ..
[root@reek private]# cd ..
[root@reek vz]# cd ..
[root@reek 119]# ls
aquota.group aquota.user backups-3005136-veportal_3005136_06-26-14_75f32b95cc_vesave.tar bin boot dev etc home lib lib64 media mnt opt proc root sbin selinux srv sys tmp usr var vz
[root@reek 119]#
[root@reek 119]# pwd
/vz/private/119
[/code]
30.     Remove the vz folder, we don’t need that anymore.
[code lang=”bash”]
[root@reek 119]# rm -rf vz/
[/code]
31.      Almost there. Try and start your new VPS.
[code lang=”bash”]
[root@reek 119]# vzctl start 119
Container config file does not exist
[root@reek 119]#
[/code]

Create the VMs config file
32.      It wont start without a config file! You’ll need to make one. Its easy, lets do it now.

[code lang=”bash”]
[root@reek 119]# cd /etc/vz/conf/
[root@reek conf]# ls
0.conf              102.conf.destroyed  104.conf.destroyed  106.conf.destroyed  108.conf.destroyed  110.conf.destroyed  112.conf.destroyed  114.conf.destroyed  116.conf.destroyed  118.conf            120.conf.destroyed  ve-105.conf-sample  ve-107.conf-sample  ve-basic.conf-sample  ve-vswap-1024m.conf-sample  ve-vswap-256m.conf-sample  ve-vswap-4g.conf-sample    ve-vswap-solus.conf-sample 101.conf.destroyed  103.conf.destroyed  105.conf.destroyed  107.conf.destroyed  109.conf.destroyed  111.conf.destroyed  113.conf            115.conf.destroyed  117.conf            119.conf.destroyed  121.conf.destroyed  ve-106.conf-sample  ve-108.conf-sample  ve-light.conf-sample  ve-vswap-1g.conf-sample     ve-vswap-2g.conf-sample    ve-vswap-512m.conf-sample
[root@reek conf]#
[/code]
33.       Copy a config file of an existing running VPS. I’ll use 118.
[code lang=”bash”]
[root@reek conf]# cp 118.conf 119.conf
[/code]
34.      Edit that config file. You’ll need to update just a few fields towards the bottom. OS template, IP, and Hostname. Make sure these match with the data you gave SolusVM when you created the VM (Hostname, IP) and from the export (OS+arch).
[code lang=”bash”]
[root@reek conf]# vi 119.conf
OSTEMPLATE=”centos-6.5-x86_64″
ORIGIN_SAMPLE=”vswap-solus”
IP_ADDRESS=”5.254.114.190″
HOSTNAME=”wiki.import2.source.com”
[/code]
35.    Try and start your VPS it should come right up
[code lang=”bash”]
[root@reek conf]# vzctl start 119
Starting container…
stat(/vz/root/119): No such file or directory
Initializing quota …
Container is mounted
Adding IP address(es): 5.254.114.190
Setting CPU limit: 400
Setting CPU units: 1000
Setting CPUs: 4
Container start in progress…
[root@reek conf]# vzlist -a
CTID      NPROC STATUS    IP_ADDR         HOSTNAME
113         79 running   5.254.114.1XX   server.xxxxxxxx.com                             
117         16 running   5.254.114.1XX   xxxxxxx.com
118         86 running   5.254.114.2XX   xxxx.xxxxxx.com
119         19 running   5.254.114.190 wiki.import2.source.com
[root@reek conf]#
[/code]
36.       Check in the SolusVM master your VM should be green and running fine.
Don’t forget to remove the backup file that you used.

Comment on this post if I missed anything or if you are having any issues:).
Time Capsule Time Machine Debugging – Tips to Curb Your Frustration

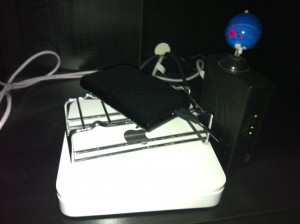
The Apple Time Capsule is a great device.  I have the 500GB model, Lis bought it for me a few years ago for the holidays.  It provides wifi/wired connectivity to a few devices in my home, my imac, mba, iPhone, Canon mx860 wireless printer, my Boxee Box, and my Windows 7 machine. I have a 500GB WDD external HDD attached to my TC for movies via my Boxee Box and a extra backups.  I also recently moved my itunes library to my Time Capsule so I can share it between devices in my home.

The Time Capsule (TC) provides automated incremental backup for my imac and my mba without fuss and provides a nice UI for restoring files which I rarely use but I like the peace of mind of not having to worry about backups outside watching a circle spin near my clock once in awhile.

While this is a great Apple multifunction device, it does have problems at times.  Most of our Apple products work flawlessly and we are spoiled by the convenience of a stable, intuitive, and refined operating systems and devices.  The Time Capsule is a great device but when it has problem, it can be a real pain in the ass to resolve.  If you use a few tools that I will highlight in this post and use resources available in the wild I assure you that you can overcome any problem with this device in a matter of hours.

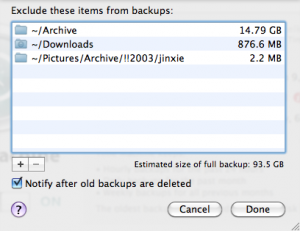
Backups are full or you do not have enough space left on your TC to complete a new backup.  Exclude files.  Time Machine Preferences -> Options.  You do not need to backup your Archive directory of every app or discography you downloaded.  Backup your important files with Time Machine.  Take your heavy weight GBs of mp3s or videos and back them up elsewhere.  Start fresh, wipe the TC disk and start a new backup if you are still having issues.  Let it run overnight.

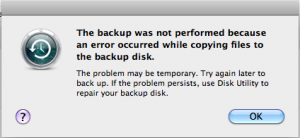
Backups fail and I don’t know why

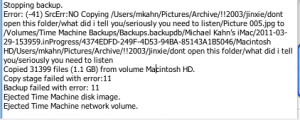
Very helpful error!  So now you must check logs for more details.  There is a handy dashboard widget that sorts through the TM logs called Time Machine Buddy, this widget reads the Time Machine logs and lets you know what may causing the error.  In this case I had a permissions or file error from files copied from a Windows machine:

So I went ahead and excluded this directory as its not completely important that its backed up, its backed up elsewhere as well.

I tried to run backups again and they failed , so I excluded a the entire /Pictures/Archive directory.  The files in this directory had odd paths and were copied from a Windows machine so they are on warning and instead of checking each dir/file for now I just excluded this entire directory since its backed up in another place as well.   Turned TM on/off and tried to backup again.  It worked, backup finished.

Backup speeds are slow, take days, randomly fail, I cant copy files over 2GB over wireless.  Open airport utility.  Disconnect other devices.  Stop all other devices connected to the Time Capsule.  They may be effecting the network. 9 out of 10 times when I’ve tried to copy a 6GB bluray to my TC and they have failed, I’ve stopped all other network activity and let the copy go, it will complete quickly and shred the previous copy time by 3/4ths.  I’ve come to the conclusion that the Time Capsule just cant balance multiple bandwidth intensive threads very well.

If you are still having problems with Time Machine check these resources as most likely someone else has experienced the same problem and the solutions is out there.  Check Airport Utility, restart the Time Capsule, and search your error message on one of these sites.
http://discussions.apple.com/forum.jspa?forumID=1253&start=0
http://forums.macrumors.com/

Time Machine Editor
http://timesoftware.free.fr/timemachineeditor/
Lets you edit the Time Machines backup interval

Time Machine Buddy

http://www.bluedog.com.au/default/Time_Machine_Buddy.html
Dashboard widget that reads your system logs and lets you provides data on what could be causing your TM issues

So learn your device, have patience with it, and most of all put forward effort into working with it.  It works with you so give it the courtesy of debugging, checking logs, and working through its quirks before condemning at it.  Please post you solutions, thoughts or questions in the comments if you have problems comment and I’ll try my best to help.

Btw happy world backup day!

Automating NZB Movie and TV Downloads

SABnzbd
http://sabnzbd.org/

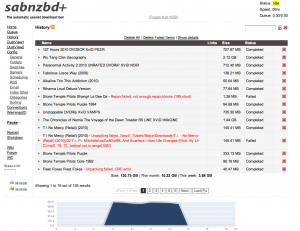
SABnzbd is a usenet reader/downloader that is highly extensible and handles downloading, verifying, repairing and unpacking .nzb files for you.  Its lightweight, written in Python and runs on almost every OS; OSX, Windows, Linux, BSD.

CouchPotatoApp
http://couchpotatoapp.com/
http://forums.sabnzbd.org/index.php?topic=4636.0

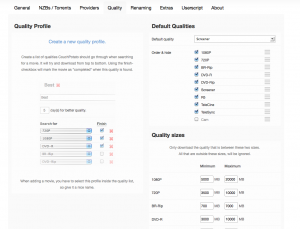
CouchPotatoApp connects with SABnzbd and nzbmatrix.com and lets you maintain a want list of movies and helps automate searching, handoff, and post download file modifications.

CP scans every X hours for titles you add and allows you to configure with different options such as file size and quality.  It also renames and moves files which is very useful if you download and store on two different machines or drives.  This app is also Python based and multi-platform.

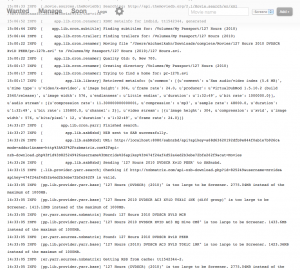
Have a look at some of the work this app is doing for you in the log

15:06:52 INFO  [     app.lib.cron.renamer] XBMC metainfo for imdbid, tt1542344, generated
15:06:44 INFO  [    app.lib.cron.subtitle] Finding subtitles for: /Volumes/My Passport/New Movie 2010)
15:06:44 INFO  [     app.lib.cron.trailer] Finding trailers for: /Volumes/My Passport/New Movie (2010)
15:00:22 INFO  [     app.lib.cron.renamer] Moving file "/Users/michaelkahn/Downloads/complete/Movies/-----/newmovie.avi" to
/Volumes/My Passport/New Movie (2010)/New Movie (2010).avi.
15:00:22 INFO  [     app.lib.cron.renamer] Quality Old: 0, New 700.
15:00:17 INFO  [     app.lib.cron.renamer] Creating directory /Volumes/My Passport/New Movie (2010)
15:00:17 INFO  [     app.lib.cron.renamer] Trying to find a home for: newmovie.avi
15:00:17 INFO  [          app.lib.library] Retrieved metainfo: {u'common': [{u'comment': u'Has audio/video index (5.6 MB)',
u'mime type': u'video/x-msvideo', u'image height': 304, u'frame rate': 24.0,
u'producer': u'VirtualDubMod 1.5.10.2 (build 2540/release)',u'image width': 576, u'endianness': u'Little endian', u'duration':
 u'1:32:49', u'bit rate': 1000000.0}], u'audio stream': [{u'compression rate':
11.300000000000001, u'compression': u'mp3', u'sample rate': 48000.0, u'duration': u'1:32:49', u'bit rate': 135800.0,
u'channel': 2}], u'video stream': [{u'image height': 304, u'compression': u'xvid', u'image width': 576, u'bits/pixel': 12,
u'duration': u'1:32:49', u'frame rate': 24.0}]}
14:33:27 INFO  [        app.lib.cron.yarr] Finished search.
14:33:27 INFO  [          app.lib.sabNzbd] NZB sent to SAB successfully.
14:33:26 INFO  [          app.lib.sabNzbd] URL: http://localhost:8080/sabnzbd/api?apikey=-----&mode=addurl&name=http%3A%2F%2Fnzbmatrix.com
%2Fapi-nzb-download.php%3Fid%-----%26username%-----%26apikey%-----&cat=Movies
14:33:26 INFO  [          app.lib.sabNzbd] Sending 'New Movie 2010 DVDSCR XviD PEER' to SABnzbd.
14:33:15 INFO  [.lib.provider.yarr.search] Checking if http://nzbmatrix.com/api-nzb-download.php?id=-----&username=-----
&apikey=----- is valid.
14:33:05 INFO  [pp.lib.provider.yarr.base] "New Movie (DVDSCR) (2010)" is too large to be Screener. 2775.04MB instead of the
maximum of 1000MB.
14:33:05 INFO  [pp.lib.provider.yarr.base] "New Movie 2010 DVDSCR AC3 XViD T0XiC iNK (diff group)" is too large to be
Screener. 1413.12MB instead of the maximum of 1000MB.

Very convenient.  After CP finds a movie that I added to my want list, it sends it to SABnzbd, then it moves it over to my SAN (/Volumes/My Passport).  From there my boxee box has the SANs location saved and scans for folder updates every few hours.  So all I have done is added a movie I want to see to the CP want list and soon after its released its ready to play in my living room.  I have heard that Sick Beard is good for TV shows but I do not miss too many on cable with my DVR.  I highly recommend SABnzbd x CP x Boxee for automation and ease with viewing movie downloads.  Enjoy!

Setting up Apache / MySQL / PHP on Snow Leopard Server

Apache
Turn on the Web service in Server Admin
Server Admin -> Select your server -> Settings -> Services
Select the Web checkbox
Click Save
Web should now appear on your Server Admin side pane
Start Web Service

or via terminal
[code lang=”bash”] sudo serveradmin start web
sudo serveradmin fullstatus web

[/code]

MySQL
Turn on the MySQL service in Server Admin

Server Admin -> Select your server -> Settings -> Services
Select the MySQL checkbox
Click Save
MySQL should now appear on your Server Admin side pane
Start MySQL service

or via terminal
[code lang=”bash”] sudo serveradmin start mysql
sudo serveradmin fullstatus mysql [/code]

PHP
In a terminal window edit /etc/apache2/httpd.conf

[code lang=”bash”] sudo nano /etc/apache2/httpd.conf [/code]

uncomment this line:
LoadModule php5_module           libexec/apache2/libphp5.so

Restart Apache
[code lang=”bash”] sudo apachectl restart [/code]

Create a phpinfo.php file and drop it in an active site directory or /Library/WebServer/Documents

[code lang=”php”][/code]

Browse to http://yourserverip/phpinfo.php or http://localhost/phpinfo.php to verify

Easy enough right? 🙂