Preface
Snow Leopard Server takes control over bind and named and provides you Server Admin to configure DNS. Apple wants you to use Server Admin either via Server Admin Tools, Server Admin within Remote Management, or via serveradmin on terminal or via ssh to your SLS. You may want to start fresh if you are having trouble with dns service after modifying config files by hand. Small changes and file modifications can corrupt the entire DNS service. If you are having trouble with DNS try to telnet to port 53 on your machine and check dig and dns reports on your domain. If these fail consider starting fresh.
You’ll need
OS X Snow leopard server with remote access
A domain name and access to your domains management console
2 IP addresses, one for each name server you’ll use
To plan a bit– figure out which IPs you want to use for name servers, what you would like to call the name servers
To begin
Rndc is not necessary for named to work on SLS
Any db zone file edits via command line will be reverted/overwritten with Server Admin
DNS zones are stored in /var/named/zones
Basic server network config like IPs and a network resolver need to be functioning. See network connections and /etc/resolv.conf
Many times SLS relies on and uses RDNS. When you are able set RDNS for IPs you use for NS and hostnames
References
Apple.com Mac OS X Server Snow Leopard Resources – Guides
Apple.com Discussions Mac OS X v10.6 Snow Leopard
Tools
dig on your command line
dig from menandmice.com
dig from geektools.com
dns report from dns.hostdime.com
dns report from intodns.com
Downloads
10.6 DNS Defaults Use these for starting over fresh with DNS after experiencing configuration or performance issues.
Package contents:
/dns
loggingOptions.conf.apple
options.conf.apple
publicView.conf.apple
/named
localhost.zone
named.ca
named.local
named.conf
These files are all system defaults and are tested on SLS 10.6.4.
Server Admin Tools Remote administration tools, documentation and utilities that you can install on a OS X machine other than your server.
Setting up DNS
If you have not already, visit Apple.com Mac OS X Server Snow Leopard Resources – Guides and download the Network Services Admin pdf.
Skip to chapter 3 Working with DNS Service and read this chapter in its entirety if you are new to DNS. If you are already familiar and have configured or setup a DNS server before, skim it and continue to follow this article.
1. Register your domain name, register your name servers, set name servers
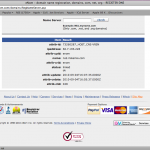
This article assumes you already have the domain name ready that you would like to setup and host on your Snow Leopard Server. The registrar I am using is Enom with a direct account. If you are using Godaddy or another registrar you may have limited access. If you are having trouble finding the register a name server function within your domain registration account contact their support team and they should be able to add your name servers for you. Here are the steps in with Enom to give you an idea of the process:
a. After logging in, go to Domain -> Register a name server
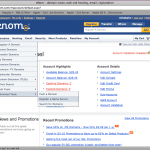
b. Add your name server (ns1.yourdomain.com) and one of the ip addresses from your server. For this example I’m using 66.7.195.226 (main server ip where the site will be hosted), 66.7.195.227 for name server 1, and 66.7.195.228 for name server 2. If you have multiple IPs on your snow leopard server try and use consecutive IPs.
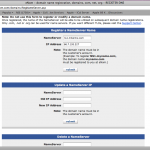
c. Add your second name server and the IP you wish to use for it
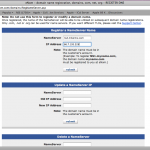
d. Check both nameservers if you can to verify they were added correctly
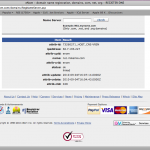
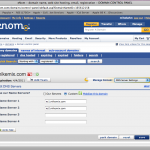
e. Set the name servers that you just created on the domain you will be hosting on your Snow Leopard Server.
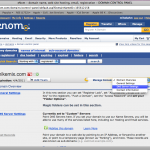
Keep in mind name server updates can take from 1-24 hours depending your location and the traffic on root dns servers.
Now that your domain name is properly configured to point to your Snow Leopard Server you’ll need to setup DNS service to host your domain.
2. Enable DNS Service
a. Launch Server Admin and connect to your server.
b. Select your server and click [Settings]
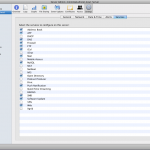
c. Click [Services] , Select the DNS checkbox. Click save.
3. Create a DNS zone and add DNS records
a. Open Server Admin, connect to your server. Click the triangle and expand the service drop down.
b. Select DNS.
c. Click [Zones]
d. Click Add Zone -> Add Primary Zone (Master)
e. Select the new zone, in the Primary Zone Name field enter the zone name, or the domain name you wish to host on your Snow Leopard Server
f. Enter the email address of the zones administrator
g. Add name servers for the zone by clicking [+] and entering the 2 name servers you created earlier.
h. Click save.
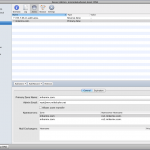
4. Finish configuring the zone. Add records.
a. Select the zone you just created
b. Click Add Record -> Add Alias (CNAME)
c. Add your domain as the Machine Name with a trailing . and click Fully Qualified
d. Enter the ip address that you’ll be hosting your site on, typically your servers main ip address.
e. Click save.
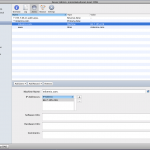
f. Click Add Record -> Add Machine (A)
g. Alias Name: www
h. Destination: Your domain name with a trailing . and check Fully Qualified
e. Click save.
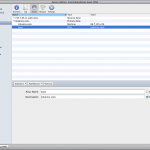
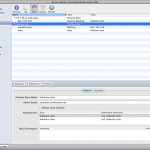
This zone was only created for web hosting not for email or any other services for the domain mikemix.com. Snow Leopard Server will attempt to obtain rdns entries for your domain and will add them above the zone you just created.
5. Configure logging
If you wish to troubleshoot DNS service visit -> DNS -> Settings -> Log Level
Here you can configure the amount of information displayed in Server Admin. Select information or debug for the most information. To trouble shoot via terminal you can :
[code lang=”bash”]
tail -F /Library/Logs/named.log[/code]
6. Configure firewall
Before proceeding you’ll want to make exceptions in the servers firewall for dns. Enable all port 53 traffic.
a. In Server Admin, Select Firewall
b. Click [Settings]
c. Click Services
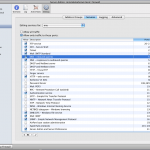
d. Click next to both DNS entries, Inbound queries and outbound queries.
e. Click save.
7. Stop and start DNS service and test your domain
You should now proceed to setup Web service and setup a Site. This web files should be placed in /Library/WebServer/Documents/domain.com or the location you set in Server Admin. This process is pretty straight forward, I will create a guide for it next.
If you setup DNS and the site correctly you should now be ready to host web sites on your Snow Leopard Server.
Starting fresh
Is DNS service not responding or acting strange? Did you modify some of the config files above outside of Server Admin? Try starting over if you arent getting results from telnet to your ip port 53 and you arent seeing responses when you dig or do a dns report on your domain.
1. Stop DNS Service in Server Admin
2. Close Server Admin
3. Grab the 10.6 DNS Defaults package mentioned above
4. Place the DNS_defaults.zip on your server, maybe on the desktop. Extract it.
5. Overwrite the following files:
/etc/dns/loggingOptions.conf.apple
/etc/dns/options.conf.apple
/etc/dns/publicView.conf.apple
/var/named/named.ca
/etc/named.conf
/var/named/named.local
/var/named/localhost.zone
(ex: In extracted dns defaults directory: sudo mv named.conf /var/named.conf)
Also rm any of the db files in /var/named and in /var/named/zones or move them elsewhere to reference later if you need to restore these zones.
6. Launch Disk Utility
Spotlight (Command+space) -> Disk Utility
or
Finder -> Applications -> Utilities -> Disk Utility
7. Click on your main disk (Macintosh HD)
8. Click the (Repair Disk Permissions) Button
9. Allow the repair to complete and restart your server
After your server comes back up from reboot check Server Admin and you’ll have a clean slate. Move back up to Setting up DNS, create a primary zone and use some of the tools above to test.
Contact me if you have any questions or need a hand setting up your Snow Leopard Server for web hosting
