Platform Testing on Google Cloud Platform and AWS

Whenever I decide to start exploring a new cloud platform I have a testing pattern that I follow. It looks somewhat like this:
1. Move all or most of my personal sites and services over to the new platform, spreading across as many platform services as possible.
This makes me aware of platform service capabilities, configuration, scale, and gives me the closest real life experience with different services beyond doing labs
2. After I have moved as much of my own personal ‘stuff’ as possible over, I usually spend a few weeks or months analyzing performance on the architecture and configurations I have created.
This allows me to improve my architecture, understand how the service bills and how I can optimize my spend, test and improve performance, identify any software or code changes to accommodate the platform, and experience platform services knobs and switches
3. Daily platform blog update reading, weekly podcasts
4. Be active or involved on platform communities
5. Take any available on demand training courses
6. Work towards certification paths or other personal set challenges
There is a more exhaustive routine that I have but for sake of this posts brevity ill keep it to these 6. This level of personal testing lets me acclimate myself with my own use cases then I have a good foundation to easily understand and being building more complex architecture on the platform.

I thought it was a good time to share a few architecture examples and iterations of what ive done with AWS and now with GCP for this site.
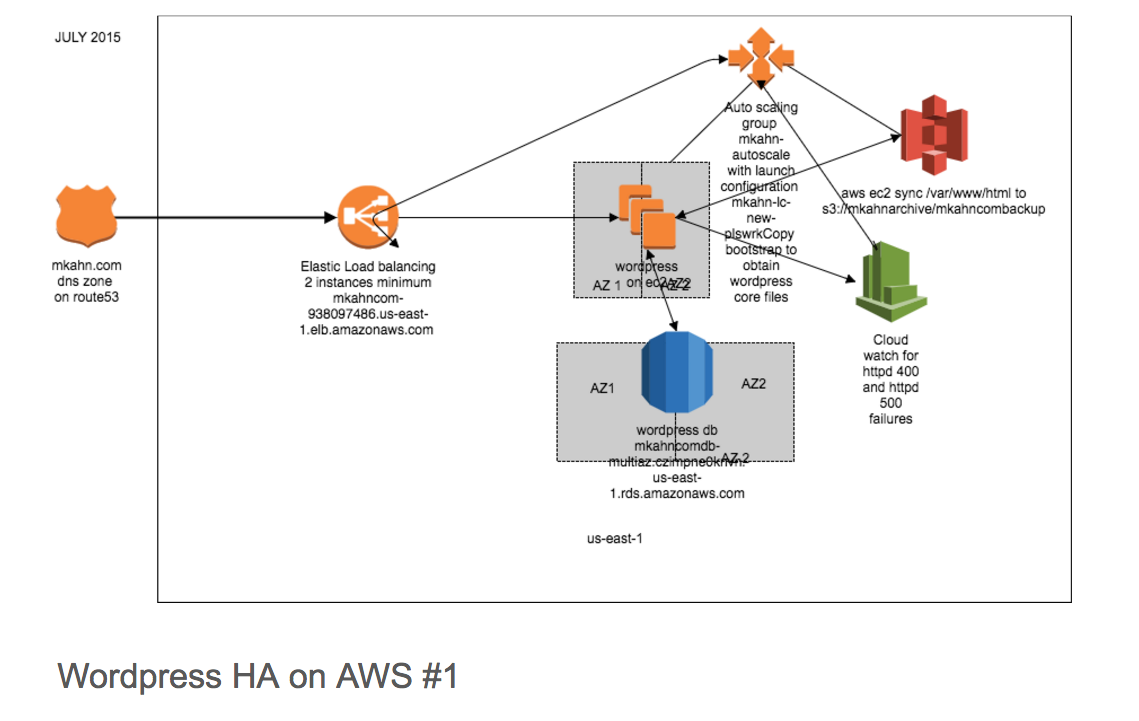
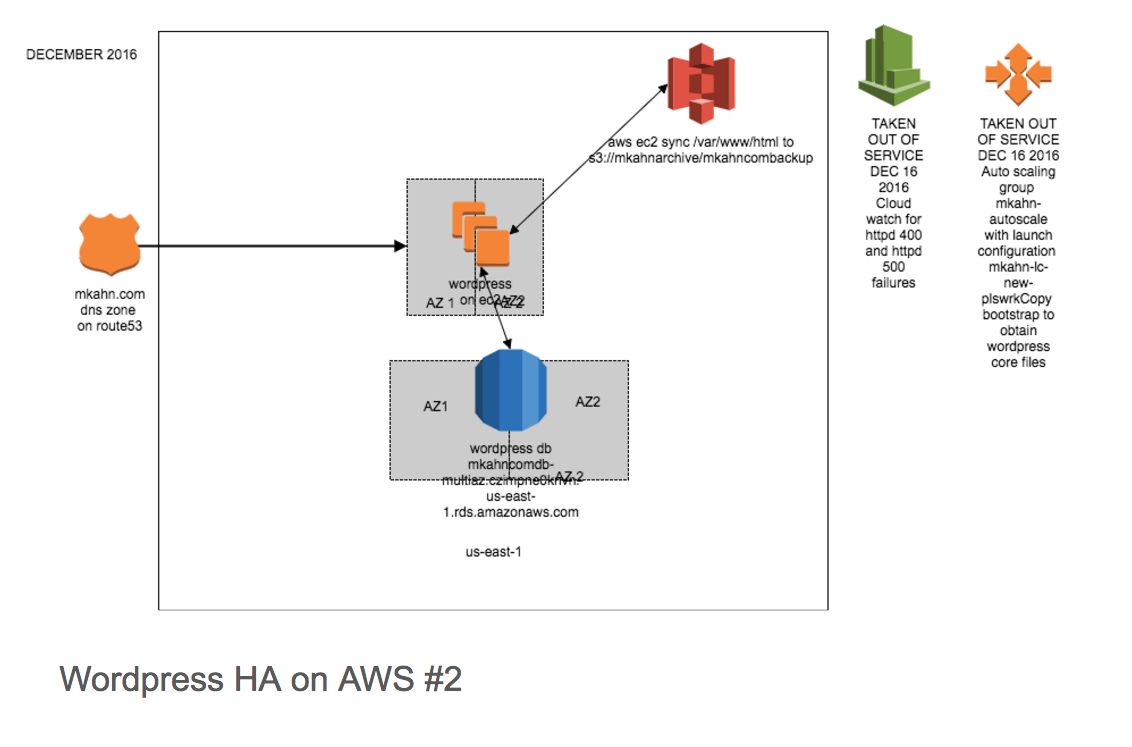
AWS part 1 and 2:
GCP part 1:
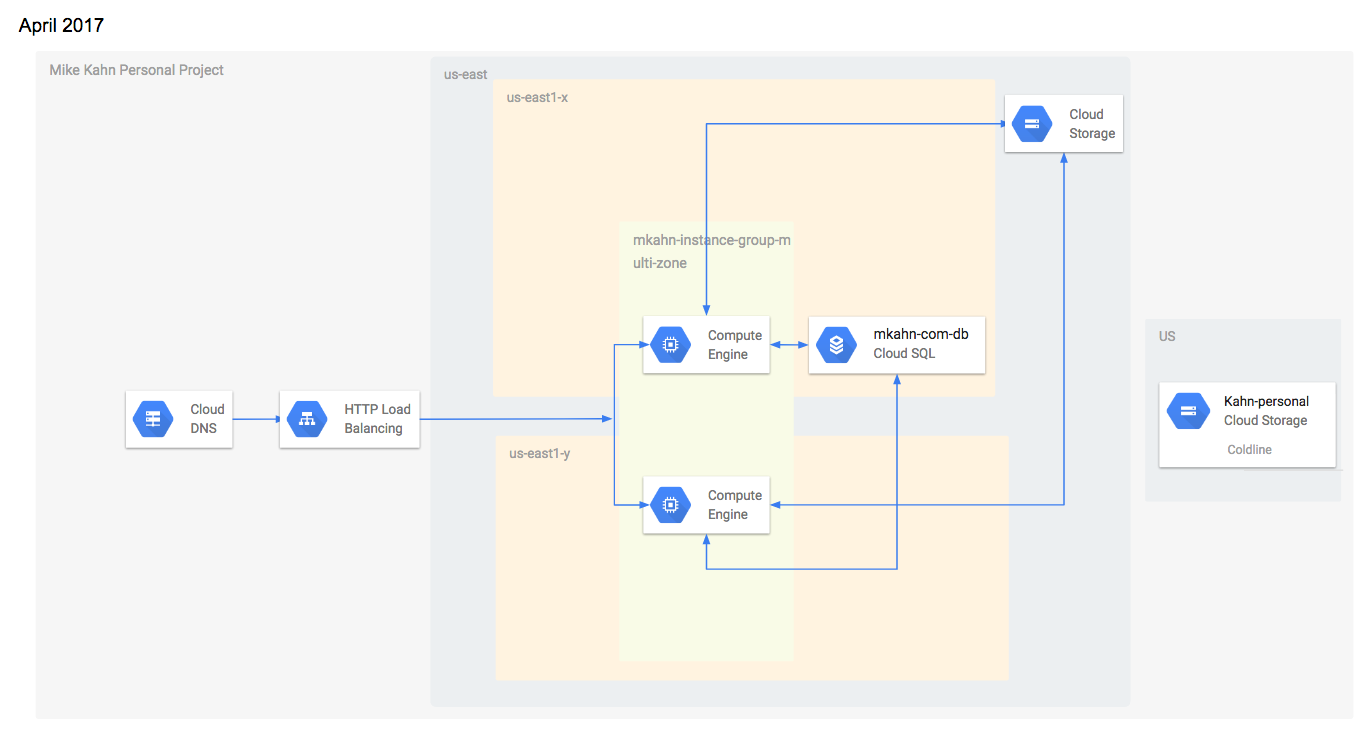
Admittedly I had a lot of credits for AWS so the first iteration lasted awhile! There are a couple more of these that I am working on for other sites and services I run that I will share later.

I’m also testing Google App Engine and Google Cloud Storage with a multipart large file upload portal and testing Google Genomics and BigQuery with my 23andme genome data.
Planning on updating here during my testing. Fun stuff 🙂
Connecting to an AWS RDS Instance via an AWS EC2 to Convert MyISAM Tables to InnoDB

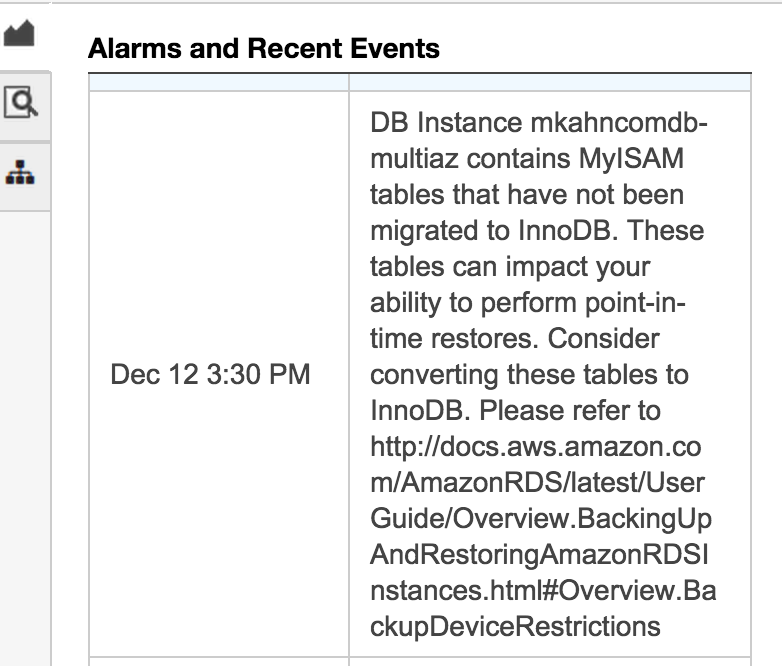
So you’ve moved over your MySQL DB to RDS and you need to do some maintenance on it. Maybe you are noticing alerts in the RDS portal like this one
screen-shot-2016-12-12-at-11-13-24-pm
Maybe you are migrating an existing MySQL DB to RDS and its setup using the MyISAM DB engine. AWS recommends to only use the InnoDB storage engine so if you have a MySQL DB that has MyISAM you should consider converting those tables to InnoDB. Its okay if you do this after moving to RDS. AWS mentions that keeping MyISAM tables may lead to unreliable behavior when restoring from backups as MyISAM does not support reliable crash recovery.

In my case, I had already moved my WordPress DB to Amazon RDS. I do not have the DB publicly accessable and you shouldn’t either especially if the front end server is on ec2. If you are wondering about RDS security, Hexatier has a good article on securing Amazon RDS here. Keep in mind your RDS and EC2 security configuration when attempt to connect to do maintenance on your DB. My first
step was to connect to my EC2 instance in the same security group as my RDS DB to use the mysql client to modify the MyISAM tables.

To connect to a remote MySQL DB:
mysql -u dbusername -p -h dbhost

After connecting run this command to convert all dbname MyISAM Tables to InnoDB

SELECT CONCAT('ALTER TABLE ', TABLE_SCHEMA, '.', TABLE_NAME,' ENGINE=InnoDB;') 
FROM Information_schema.TABLES WHERE TABLE_SCHEMA = 'dbname' AND ENGINE = 'MyISAM' AND TABLE_TYPE = 'BASE TABLE'

ref here

mysql> SELECT CONCAT('ALTER TABLE ', TABLE_SCHEMA, '.', TABLE_NAME,' ENGINE=InnoDB;') 
-> FROM Information_schema.TABLES WHERE TABLE_SCHEMA = 'dbname' AND ENGINE = 'MyISAM' AND TABLE_TYPE = 'BASE TABLE'
-> ;
+--------------------------------------------------------------+
|   |
+--------------------------------------------------------------+
| ALTER TABLE dbname.wp_commentmeta ENGINE=InnoDB; |
| ALTER TABLE dbname.wp_comments ENGINE=InnoDB; |
| ALTER TABLE dbname.wp_contact_form_7 ENGINE=InnoDB; |
| ALTER TABLE dbname.wp_links ENGINE=InnoDB; |
| ALTER TABLE dbname.wp_ngg_album ENGINE=InnoDB; |
| ALTER TABLE dbname.wp_ngg_gallery ENGINE=InnoDB; |
| ALTER TABLE dbname.wp_ngg_pictures ENGINE=InnoDB; |
| ALTER TABLE dbname.wp_options ENGINE=InnoDB; |
| ALTER TABLE dbname.wp_postmeta ENGINE=InnoDB; |
| ALTER TABLE dbname.wp_posts ENGINE=InnoDB; |
| ALTER TABLE dbname.wp_term_relationships ENGINE=InnoDB; |
| ALTER TABLE dbname.wp_term_taxonomy ENGINE=InnoDB; |
| ALTER TABLE dbname.wp_terms ENGINE=InnoDB; |
| ALTER TABLE dbname.wp_usermeta ENGINE=InnoDB; |
| ALTER TABLE dbname.wp_users ENGINE=InnoDB; |
+--------------------------------------------------------------+

So now just run the above MySQL commands to convert each table to InnoDB.
After converted in the event of a DB crash you should now be supported by the InnoDB DB engine reliable crash recovery feature.

Testing the AWS IoT Button

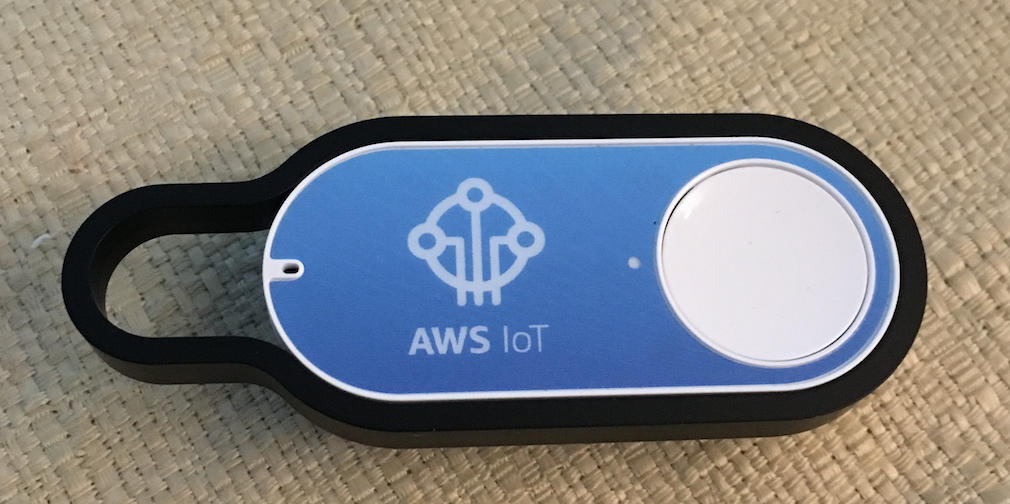
Screen Shot 2016-05-22 at 7.49.35 PM
I was able to get my hands on an AWS IoT button when it went on sale last week. I had been looking for one of these since they gave them out at re:invent last year. I believe this was the first time it was on sale to the public. I wanted the button to keep next to my bed and would program it to shut off my hue lights and change the temp on my Nest before bed. Sure, I could set each of these independently on a schedule to power off or change temp at a certain time but having one button to take care of both of these actions was what I wanted.

So the button came and I was eager to get started. AWS has a Lambda blueprint for getting started with IoT and the button. It basically uses AWS IoT button to trigger a Lambda function which creates a SNS topic and sends an email. With little configuration you can setup this demo and get some basic experience with AWS IoT.

Check the AWS IoT button page here.
Click the Configure your AWS IoT Button to get started.
Screen Shot 2016-05-22 at 7.18.10 PM

After you login with your AWS creds, what this does is kicks off a Lambda blueprint called iot-button-email that has all of the code and IoT functions associated. While creating from the blueprint make sure of a few things.
1. On Step 2 make sure to add the SQL statement ‘SELECT * FROM ‘iotbutton/+”
2. On Step 3 make sure to update your email and the IoT button serial number in the Lambda function code. Also make sure the Lambda function handler and role is set to the basic execution role.
3. On Step 4 enable the event source and create the function.

A few more tips:
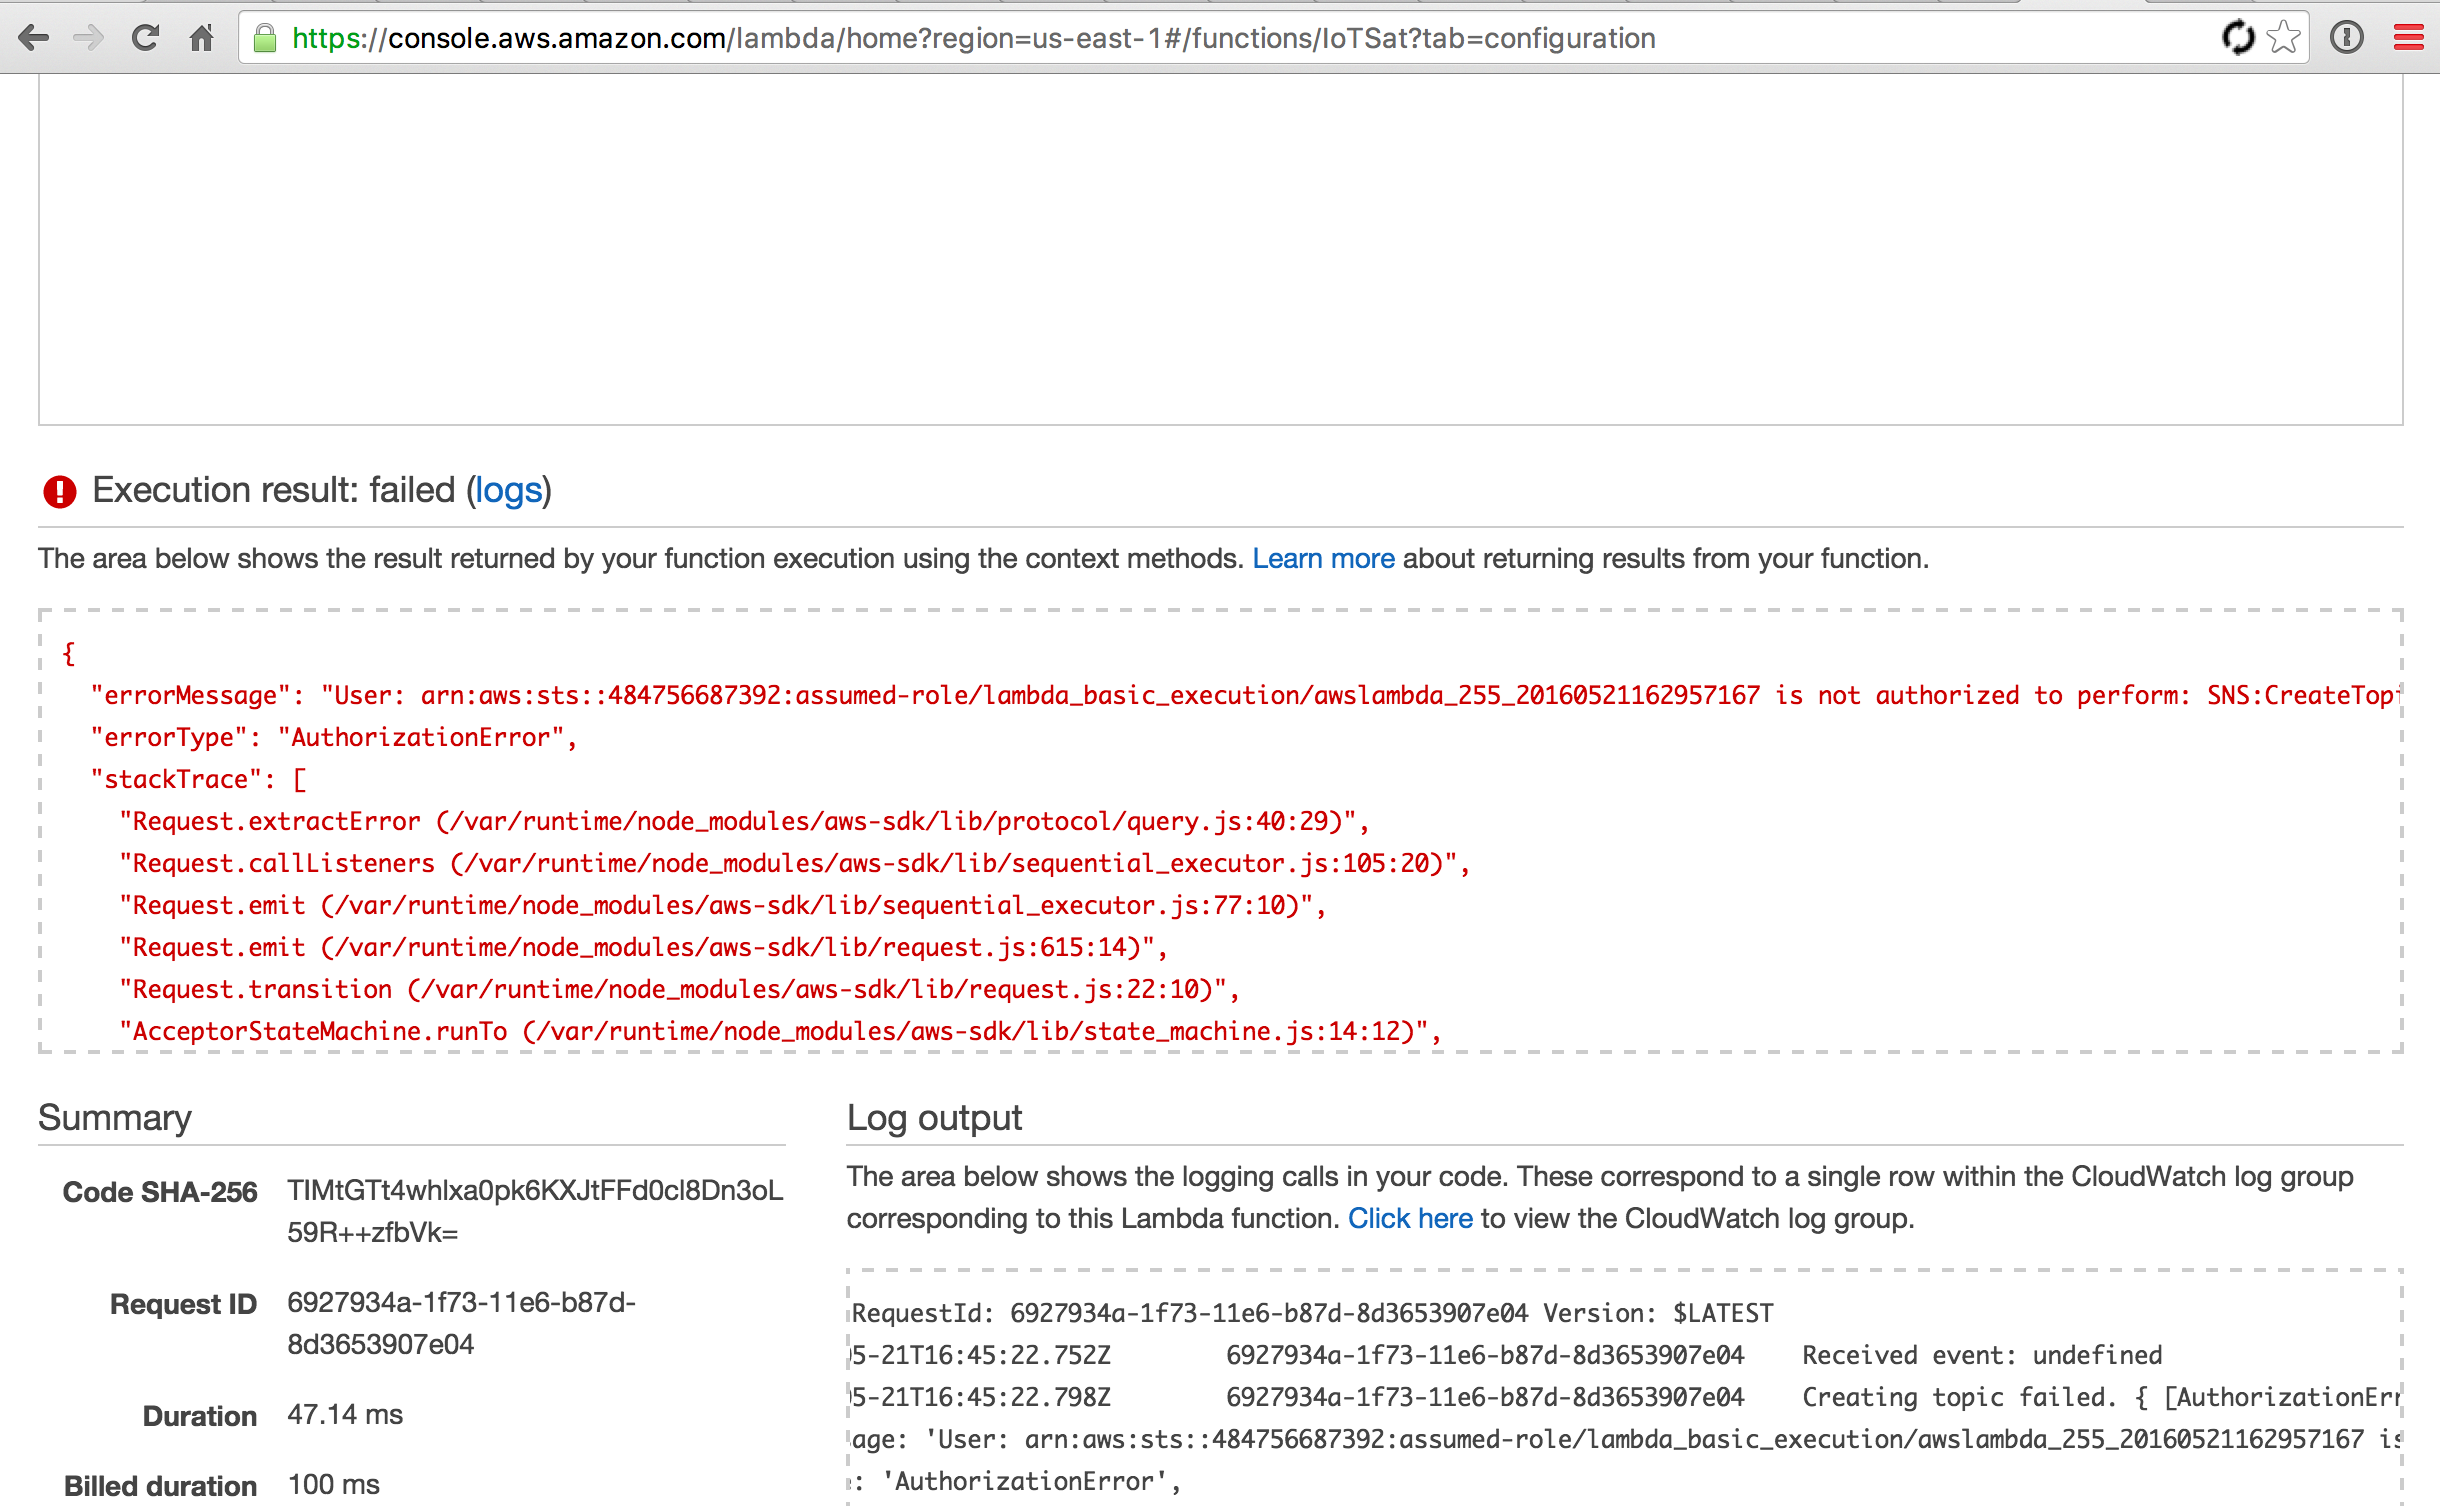
1. After my function was created there was an option to test it, it did not run. Checking the log there was an issue with the lambda basic execution role, not having authorization to create an SNS topic.
1lambda-error
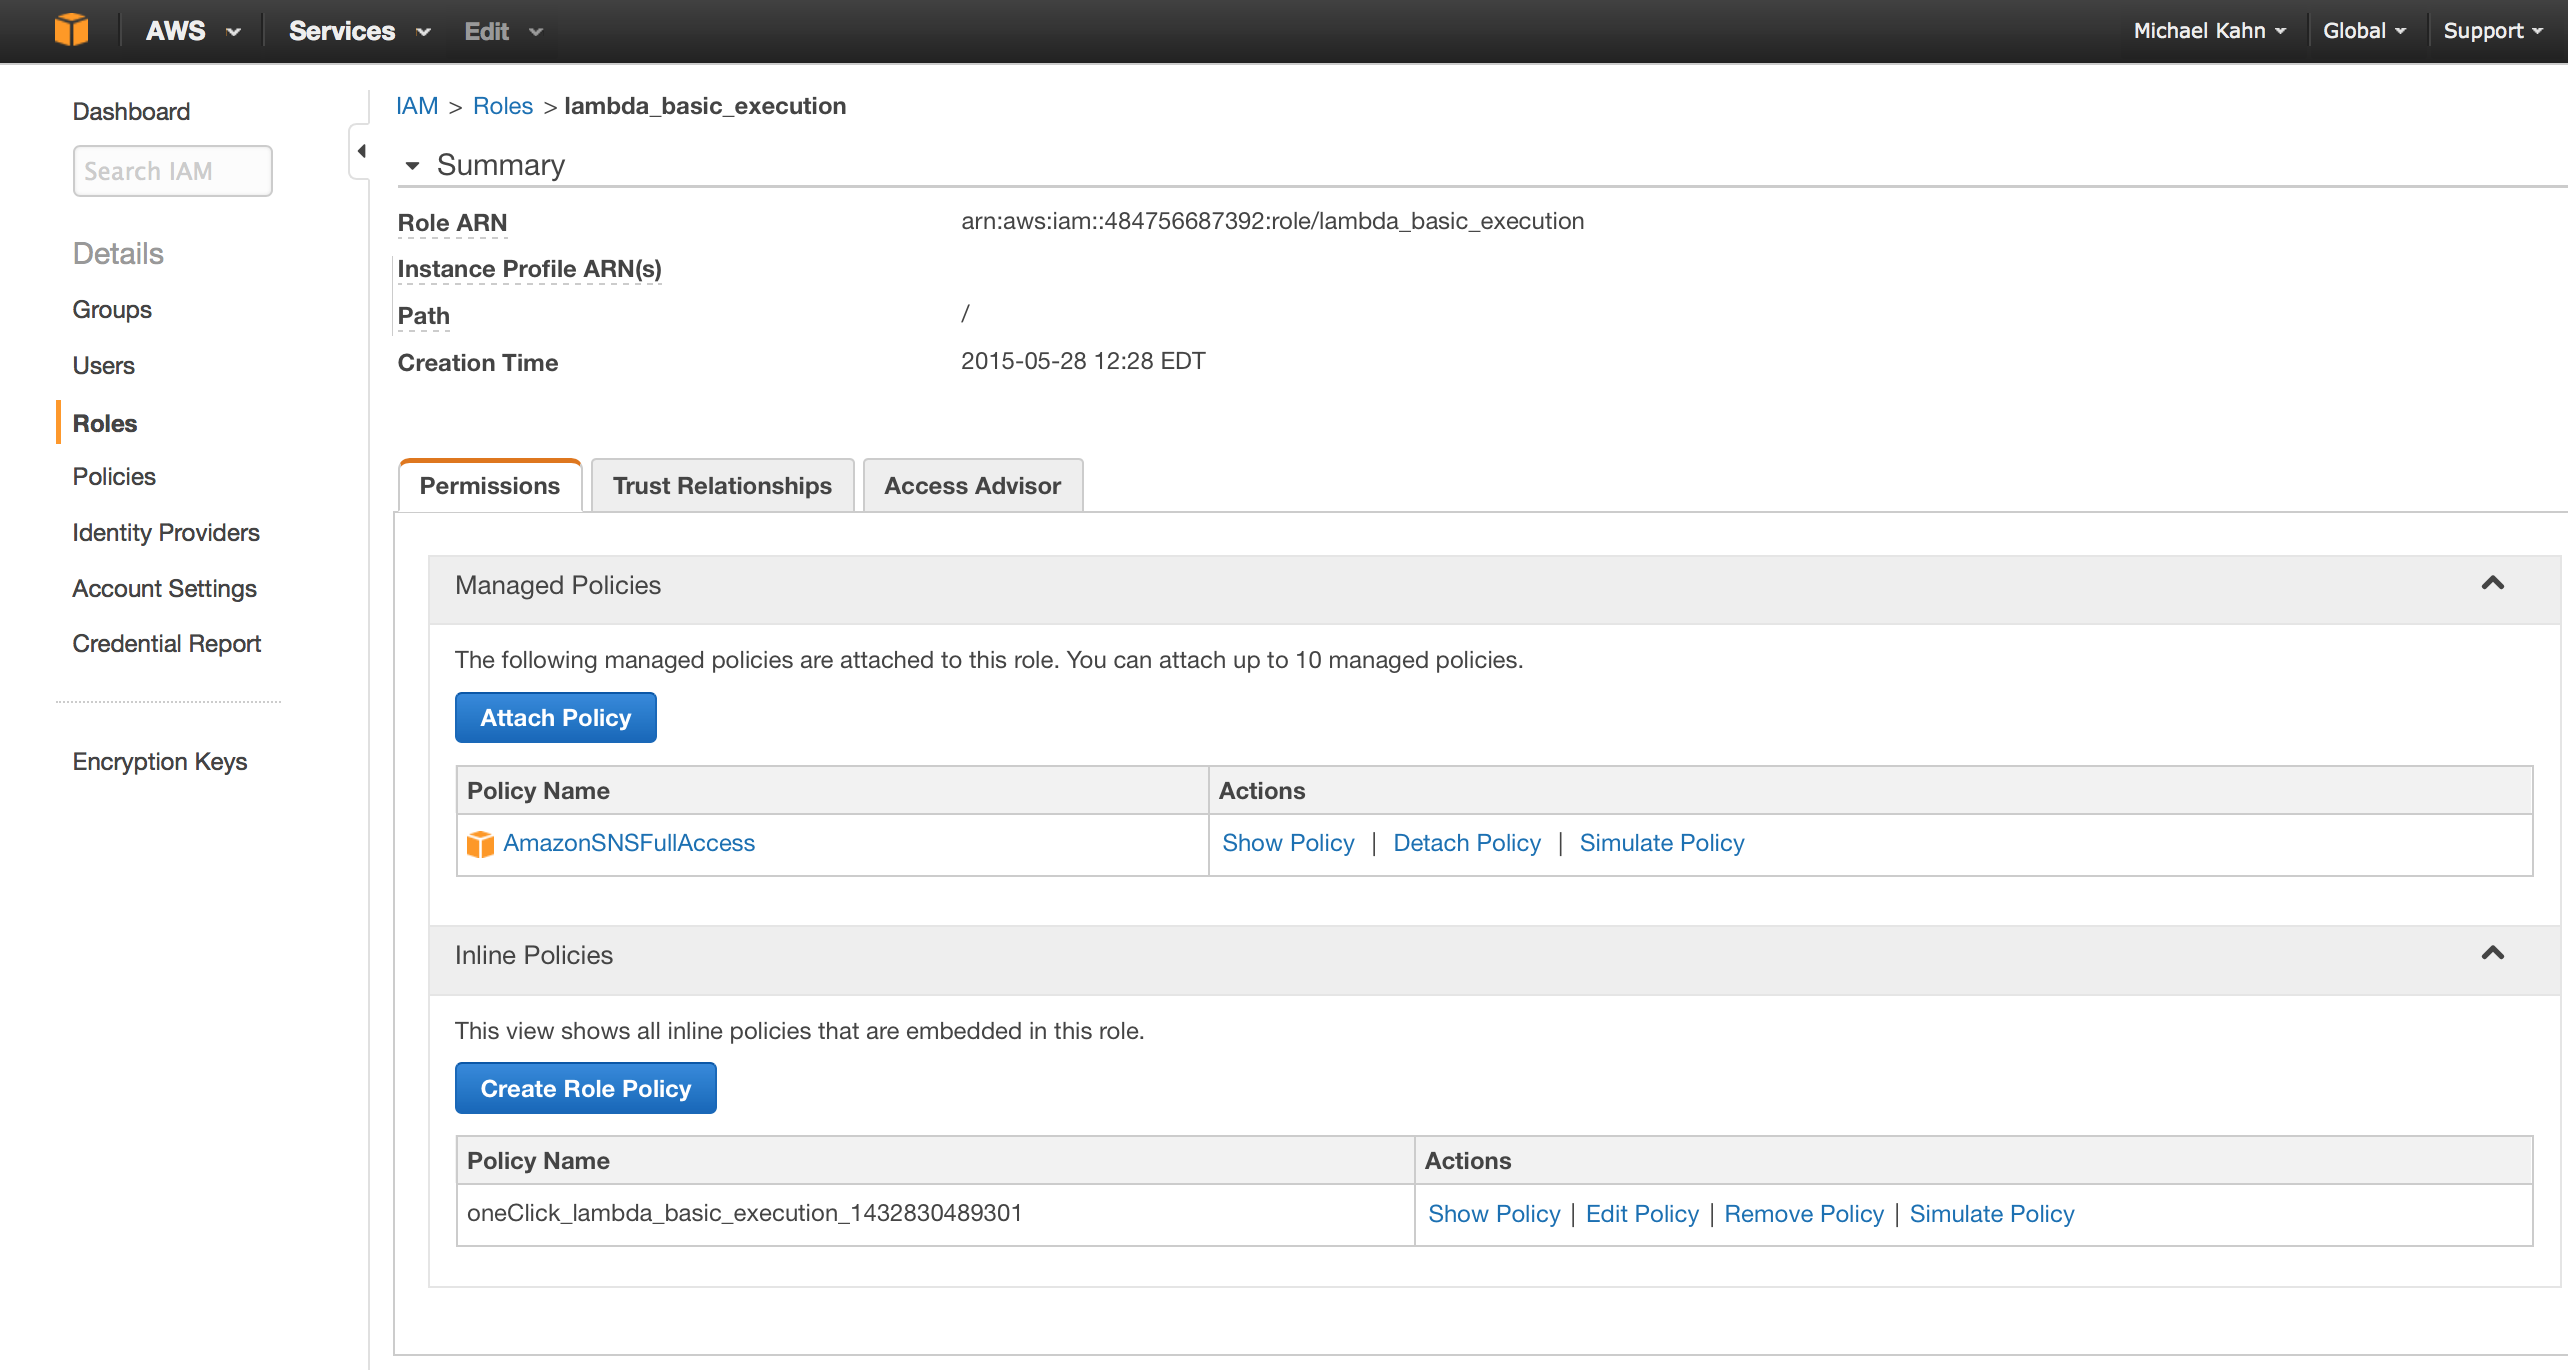
To resolve, go into Identity and access management, modify that role and add the SNS full access policy.
2iam-lambda-role
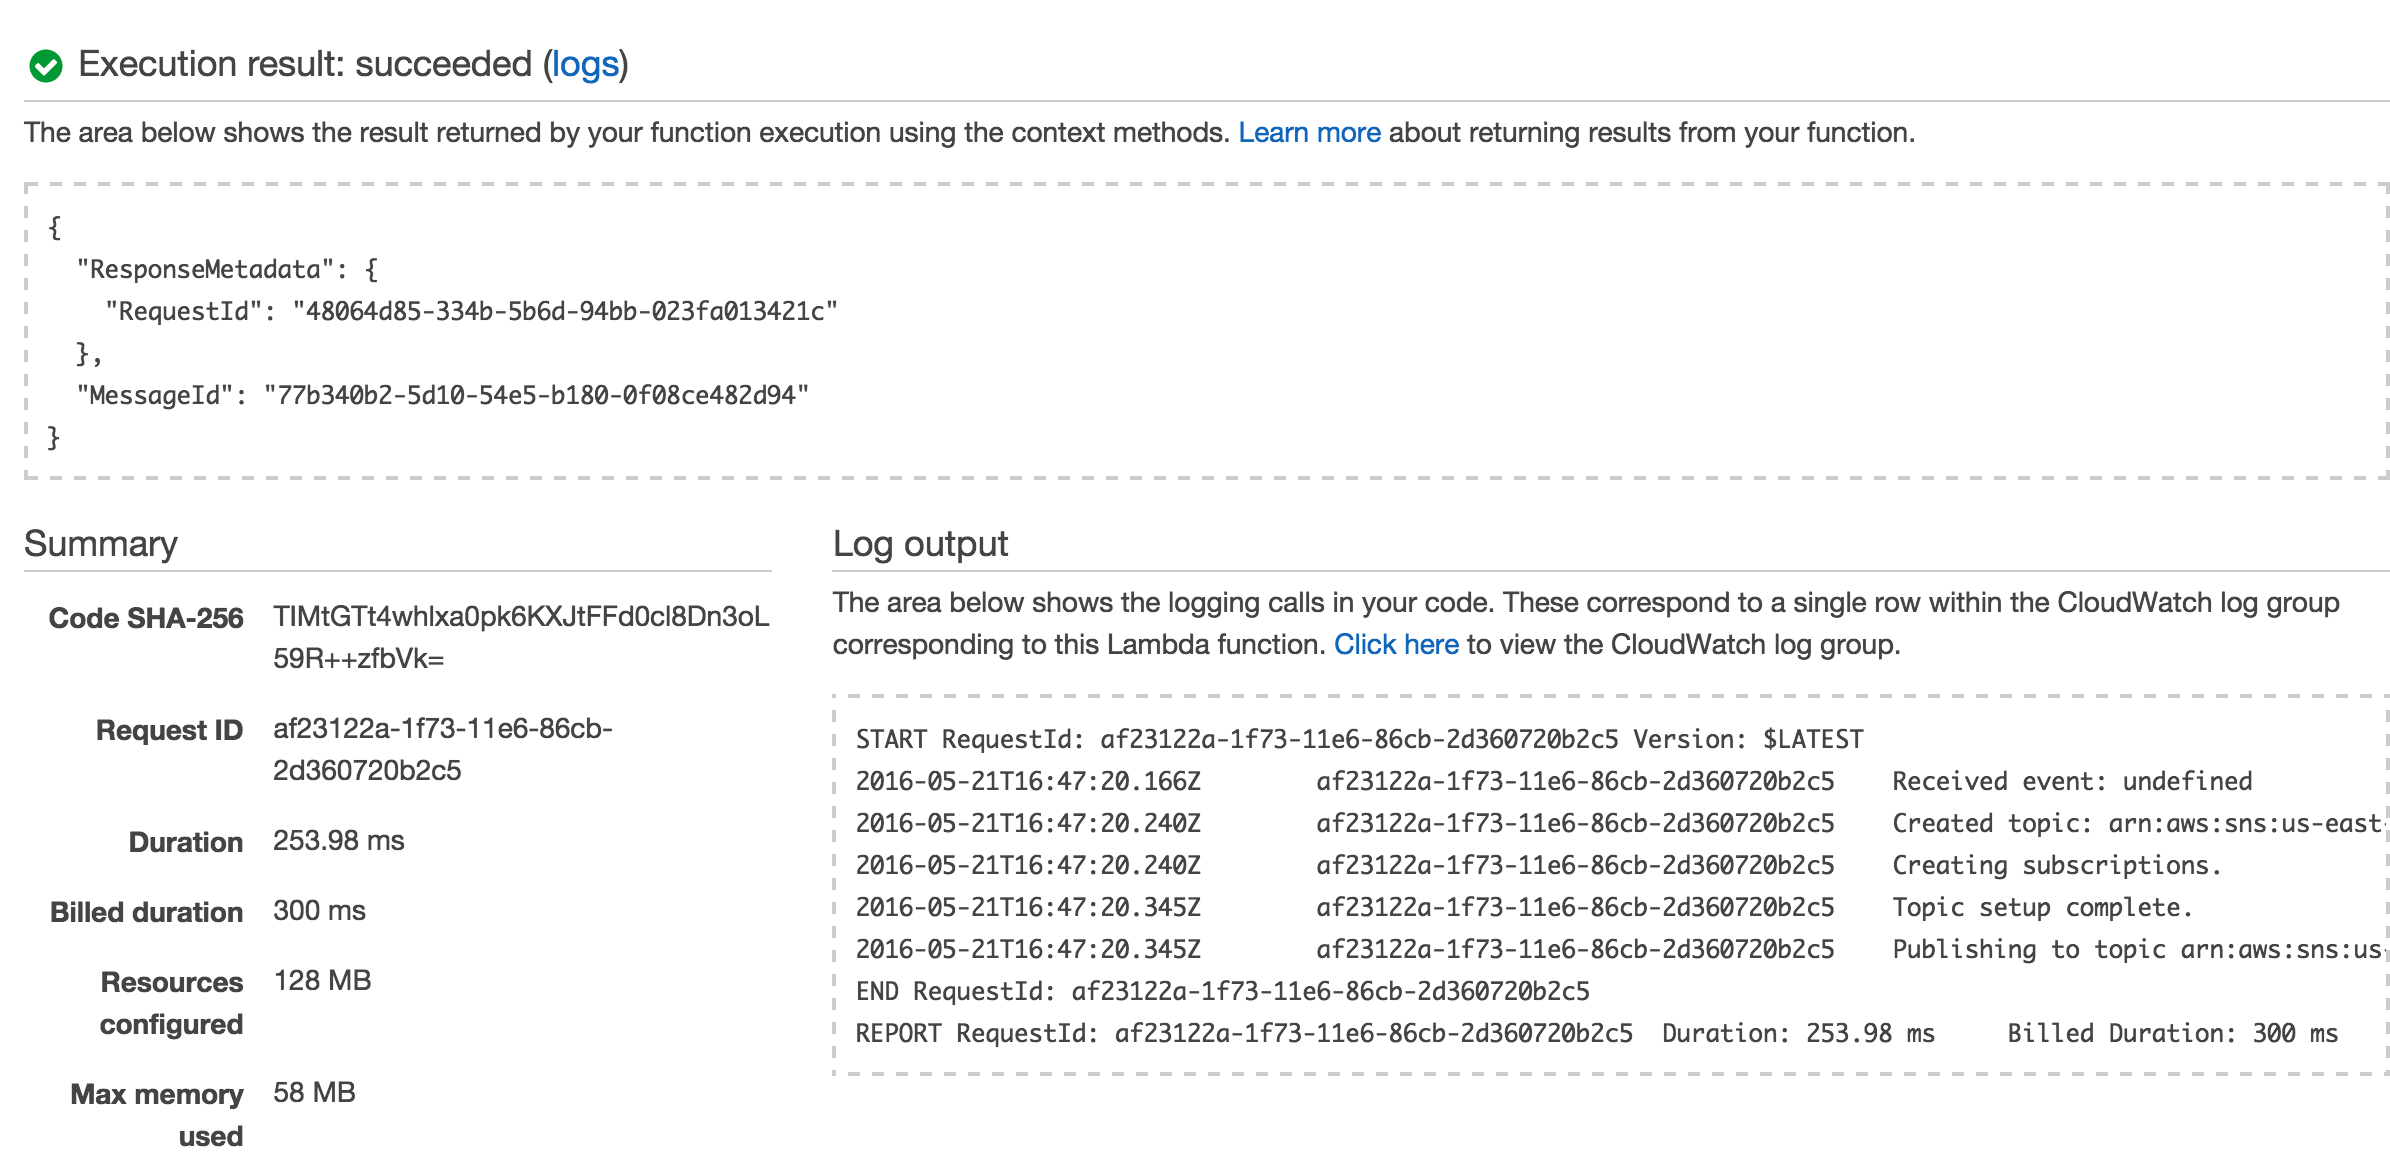
Try running the Lambda function again it should work fine.
3-lambda-success

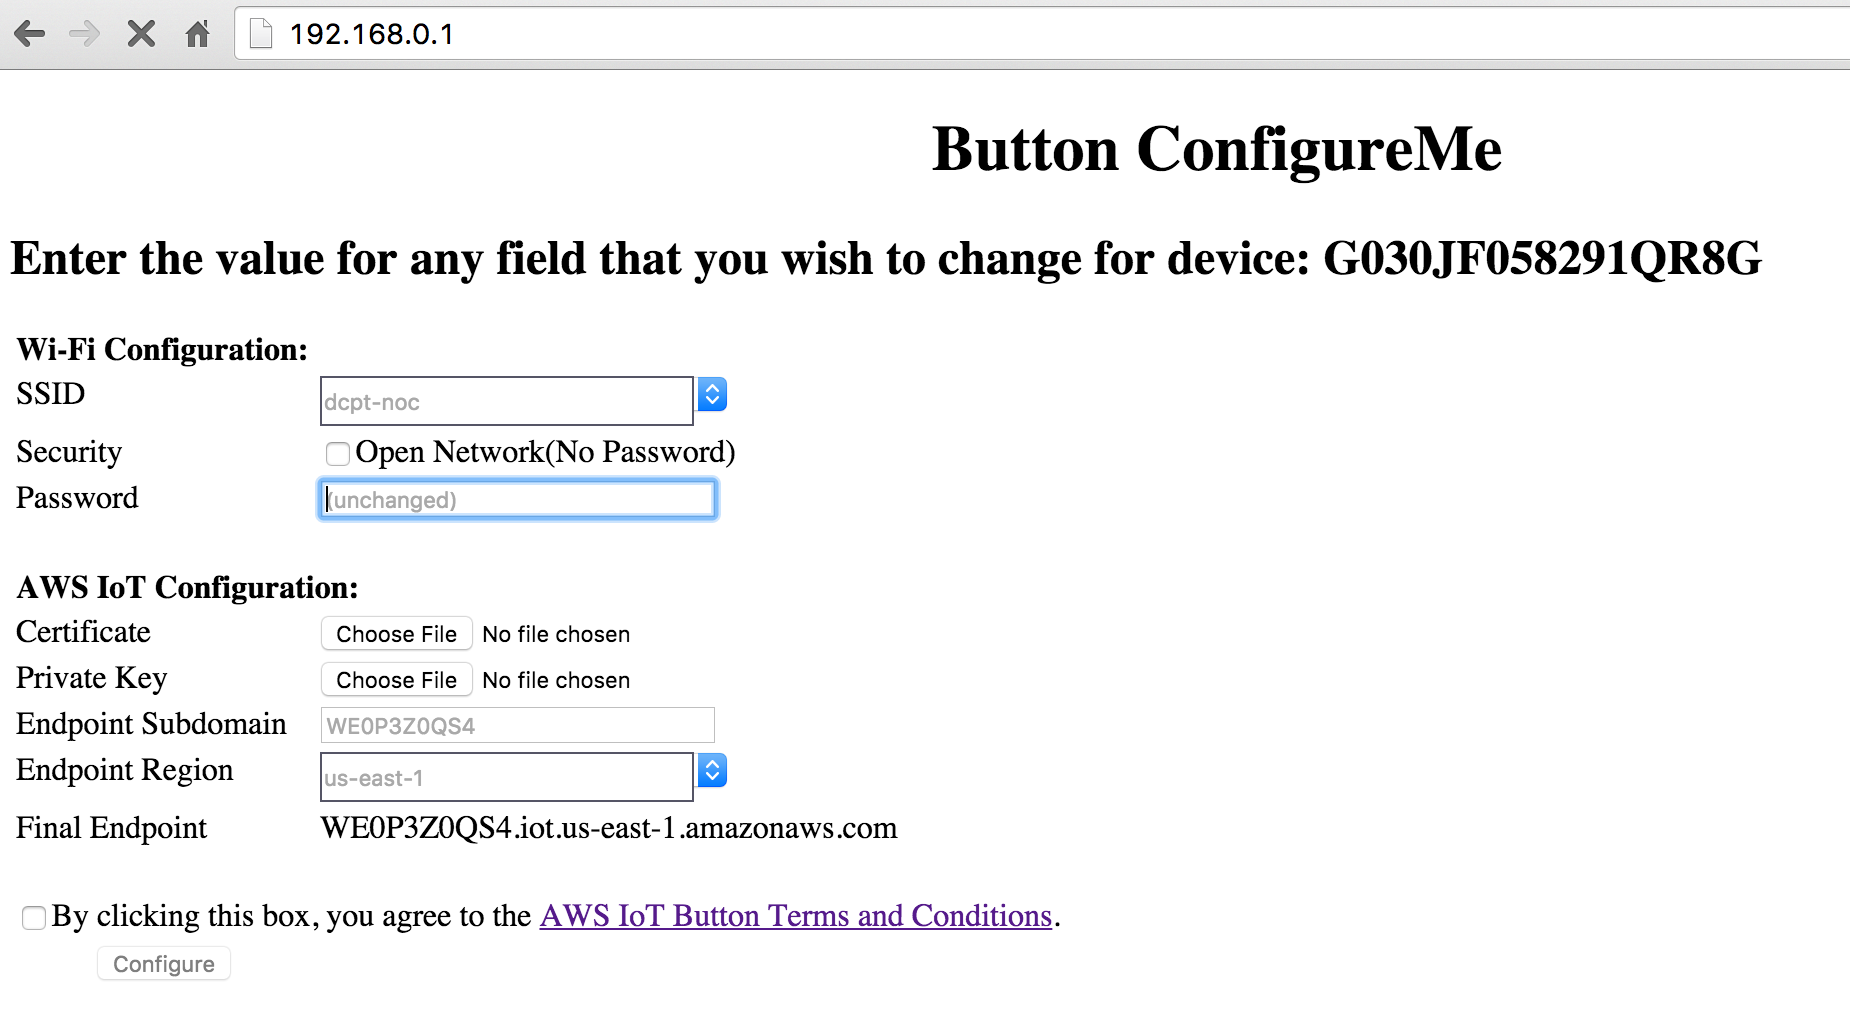
2. So now that your function runs you need to configure your button to your wifi and IoT details. The button will not work without an IoT certificate and private key.
button-configurme
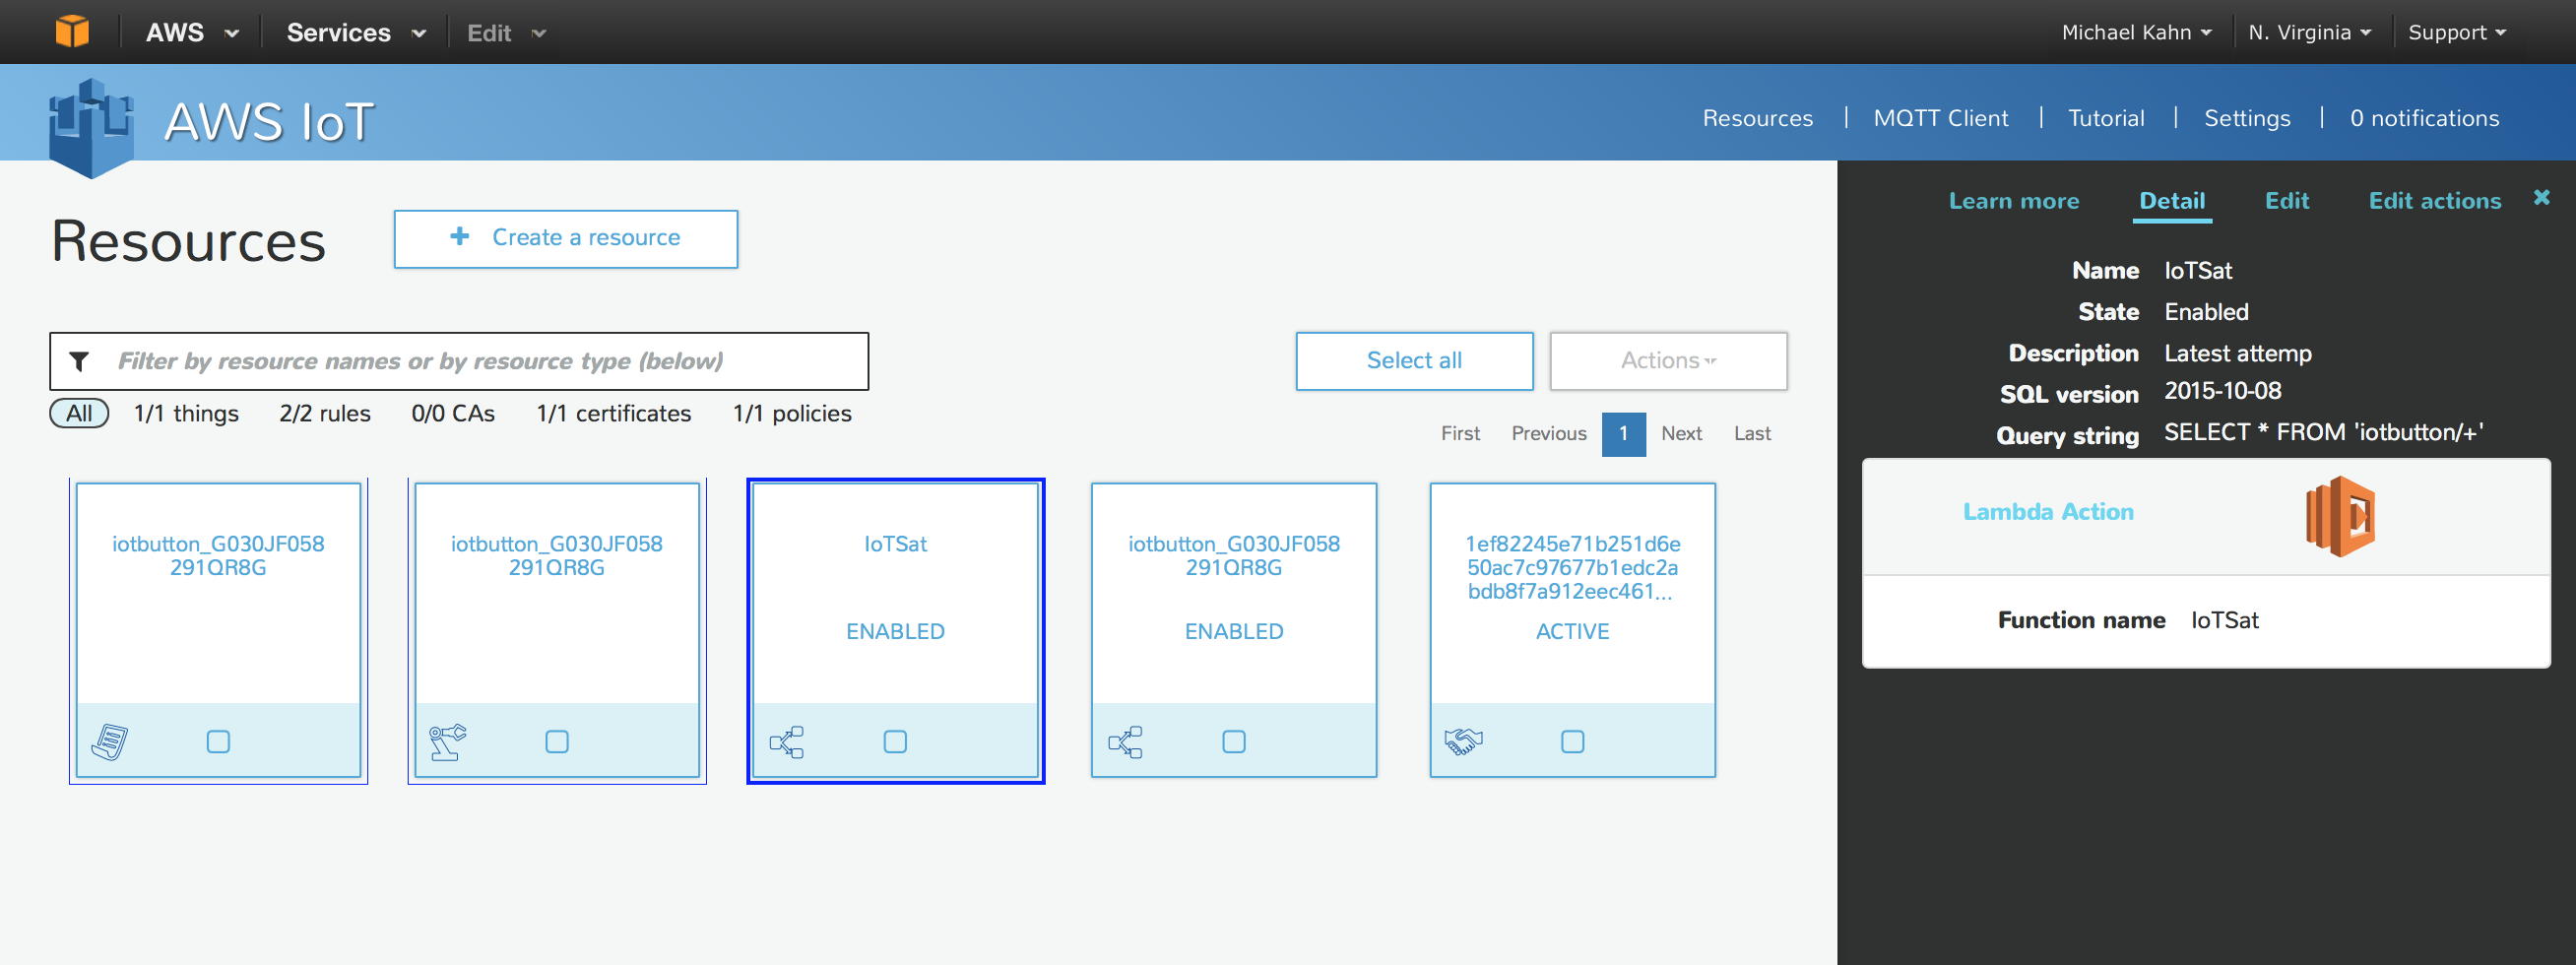
The Lambda blueprint should create some things policies and a certificate in AWS IoT, however I was not able to pull the private key from the already created certificate.iot-overview
To resolve this I recreated the certificate and attached the thing and policy to it and now I had everything needed alongside my wifi details to configure the button.

If you are having issues getting your button to respond, note the flashing light sequence and refer to the guide on the bottom of the main IoT button page here. While trying to get this working I had a few different errors, short short short (could not connect to network), long short long (certificate did not have permission to publish), long short short (certificate is not activated). Spend some time working through it, understanding how AWS IoT works, and you should be able to figure it out if you’ve made it this far.

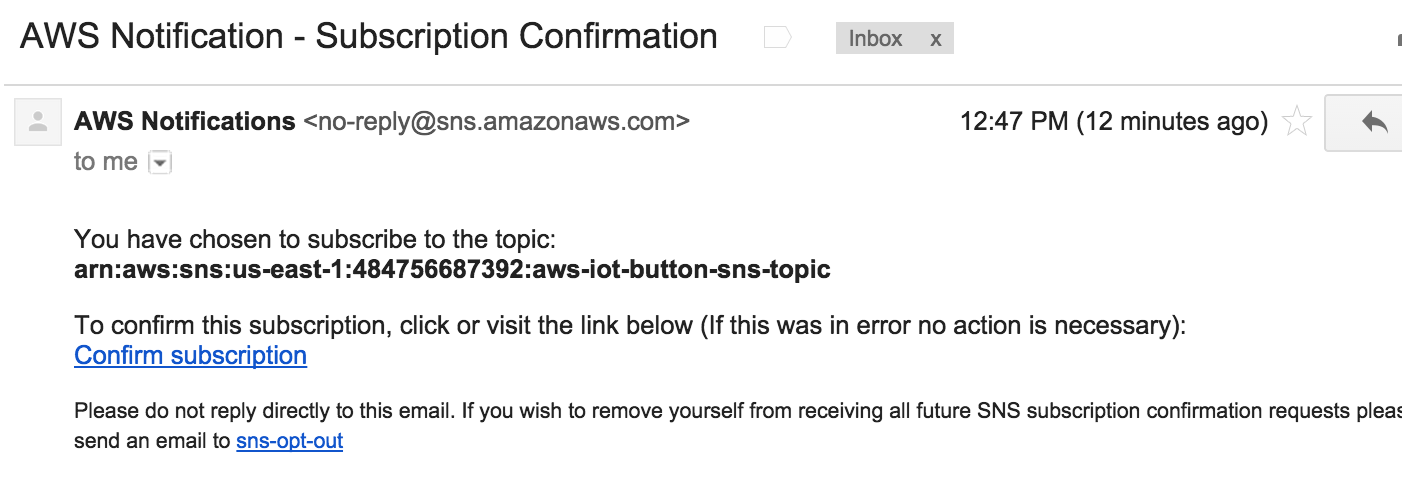
You’ll need to subscribe to the SNS topic that was created for your notifications, so be sure to confirm that subscription.
sns-subscription

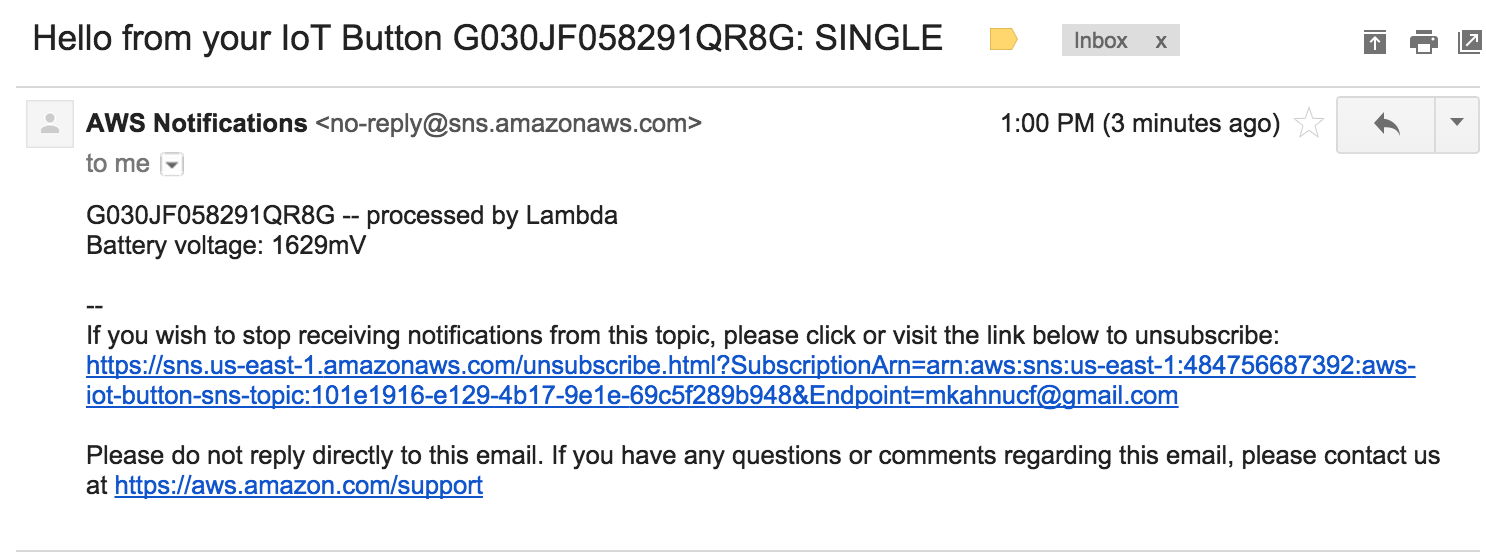
After that you should be able to receive emails from pressing your IoT button!

hello-from-iot-button

Moving forward from this very basic demo there are many possibilities.
I used and ifttt.com recipe to turn off my hue when an email is received in my gmail account from no-reply@sns.amazonaws.com from this hackster.io post. There is another beginners guide to using the IoT button that may be useful if you are testing.
Next ill try and use the hue and nest APIs to trigger actions instead of using email and ifttt.
Have fun!

Automate Florida Lottery Number Checking With This Bash Script

So I’m helping my dad with some automation to get him to do things differently. Once thing he does is regularly is check lottery numbers twice a week every week for the past 40+ years. To me its too routine and something that can be automated easily. I’m going to complete this task in 2 steps. First step which is done below is the application that sets up the environment and scrapes data. Second step is a cron that can be setup through the application and installed to validate saved numbers against winning published numbers. This way instead of manually matching his numbers with winning numbers he’ll get an email twice a week and the script will determine if his regular numbers had any luck.

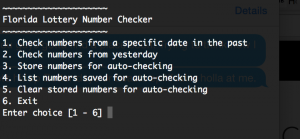
Screen Shot 2015-06-14 at 1.23.30 PM


#!/bin/bash
# Florida Lottery number checker
# mkahnucf@gmail.com
# ver 1.0
# Requires perl and lynx
# Menu source http://bash.cyberciti.biz/guide/Menu_driven_scripts
RED='\033[0;41;30m'
STD='\033[0;0;39m'

pause(){
read -p "Press [Enter] key to continue..." fackEnterKey
}

one(){
read -p "Enter date in mm dd yy format " NUMBER1 NUMBER2 NUMBER3
echo "Ok, lets check for $NUMBER1/"$NUMBER2/$NUMBER3
lynx -dump http://flalottery.com/exptkt/l6.htm | grep "$NUMBER1"/"$NUMBER2"/"$NUMBER3" | cut -b 4-41
pause
}

two(){
YESTERDAY=$(perl -e 'use POSIX;print strftime "%m/%d/%y",localtime time-86400;')
echo "Ok, lets check numbers for" $YESTERDAY
RESULTS="$(lynx -dump http://flalottery.com/exptkt/l6.htm | grep "$YESTERDAY")"
if [ "$RESULTS" == "" ]; then
echo "There was no lottery yesterday $YESTERDAY !"
else
lynx -dump http://flalottery.com/exptkt/l6.htm | grep "$YESTERDAY" | cut -b 4-41
fi
pause
}

three(){
#Store numbers
read -p "Enter numbers in xx xx xx xx xx xx format " NUM1 NUM2 NUM3 NUM4 NUM5 NUM6
echo $NUM1 $NUM2 $NUM3 $NUM5 $NUM6 >> saved-numbers.txt
echo "Ok, i've saved your numbers $NUM1 $NUM2 $NUM3 $NUM5 $NUM6"
pause
}

four(){
SAVEDNUM=$( saved-numbers.txt
echo "Ok ive cleared your saved numbers"
pause
}

show_menus() {
clear
echo "~~~~~~~~~~~~~~~~~~~~~"
echo "Florida Lottery Number Checker"
echo "~~~~~~~~~~~~~~~~~~~~~"
echo "1. Check numbers from a specific date in the past"
echo "2. Check numbers from yesterday"
echo "3. Store numbers for auto-checking"
echo "4. List numbers saved for auto-checking"
echo "5. Clear stored numbers for auto-checking"
echo "6. Exit"
}
read_options(){
local choice
read -p "Enter choice [1 - 6] " choice
case $choice in
1) one ;;
2) two ;;
3) three ;;
4) four ;;
5) five ;;
6) exit 0;;
*) echo -e "${RED}Error...${STD}" && sleep 2
esac
}

trap '' SIGINT SIGQUIT SIGTSTP

while true
do

show_menus
read_options
done

I’ll update this post once the second half is done!